How to Make a Glitch GIF from Your Photo
Turn a still photo into a glitch GIF online. Add RGB fringes and moving slices, try the settings on your own image, and export from the free browser demo.
TL;DR
- RGB Split adds colored edges while Slice Shift moves bands across a still photo.
- Open the example, replace the sample with your own image, and export a short GIF from the free browser editor.
- A repeating GIF can jump at its boundary; check the exported loop and keep its dimensions and duration modest.

To make a glitch GIF from your photo, add colored edges with RGB Split, animate horizontal bands with Slice Shift, then export the short composition as a GIF. Artfkt’s free Glitch browser editor can do this from a single still image. You do not need a video clip or Photoshop.
Try the glitch GIF example on your photo →
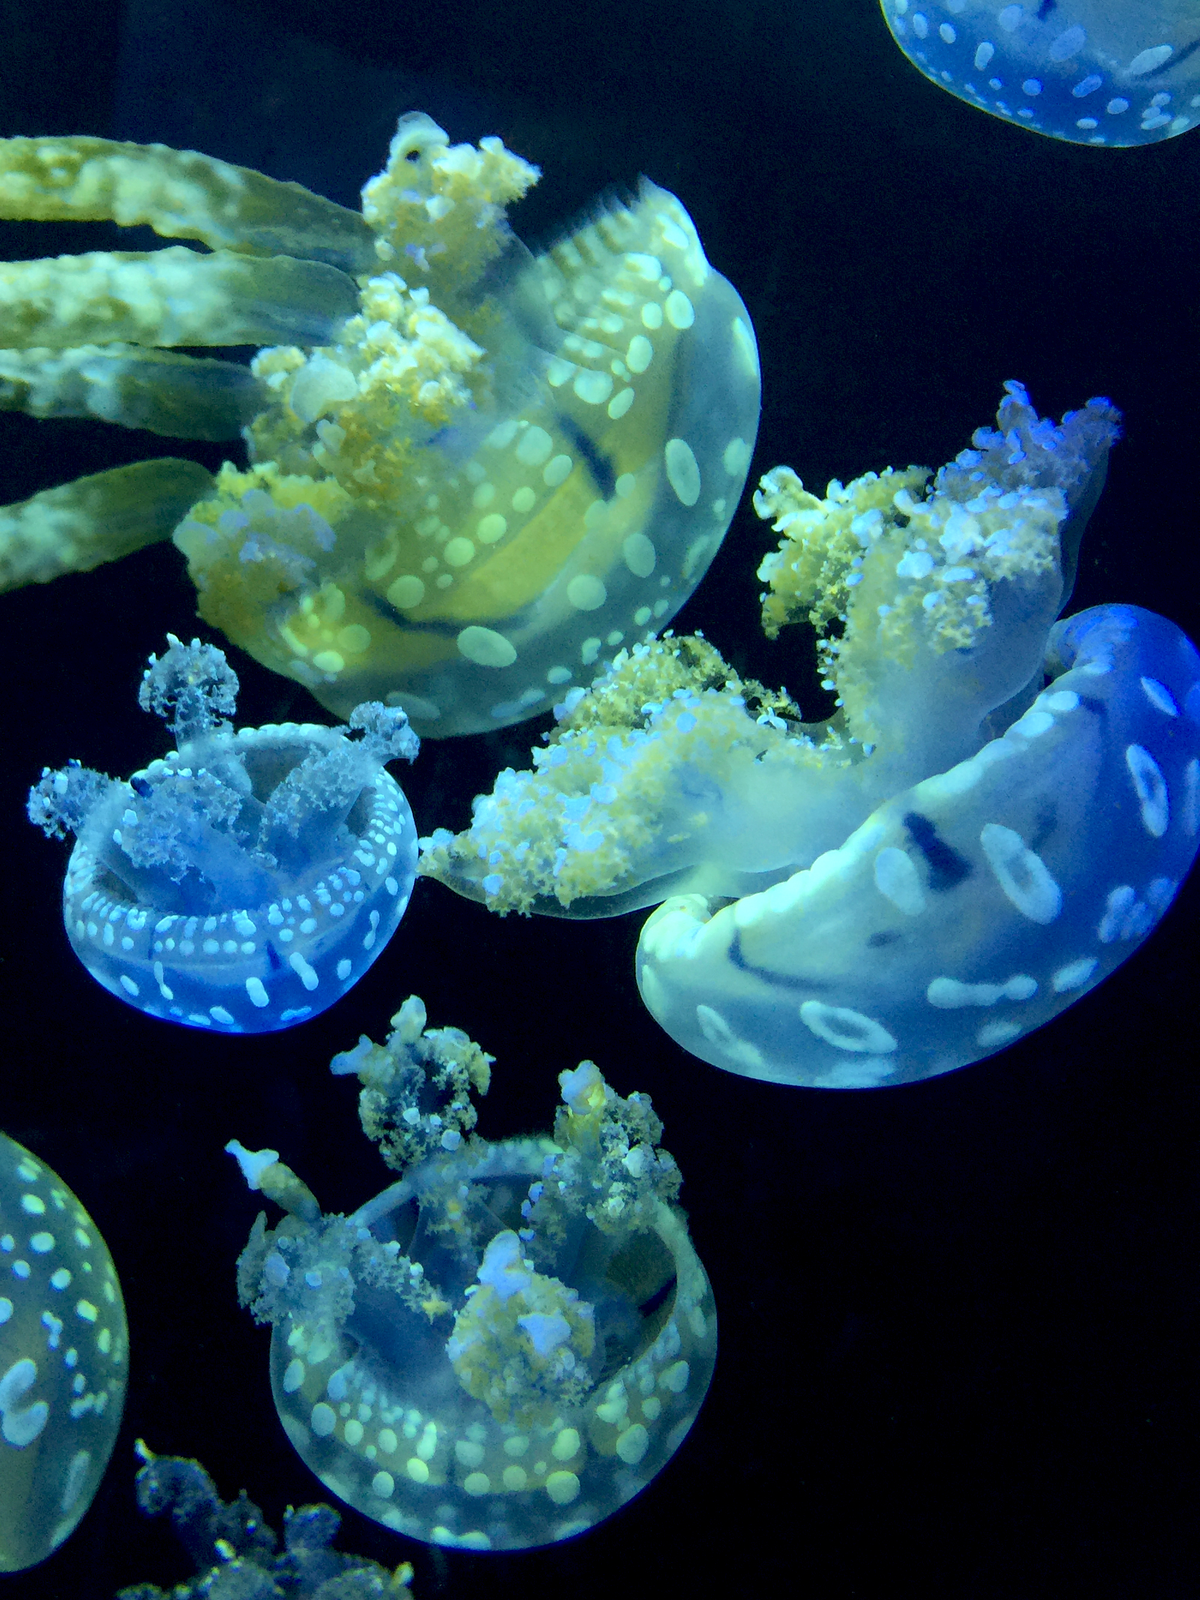
The link opens the jellyfish sample with both effects in place. Choose Open photo to replace the photograph while keeping the effects and their settings. Then choose Animate below the canvas and press Play if playback is paused. The web editor adapts to phones down to 320 px wide, including landscape. Use Layers, FX, Edit and Animate along the bottom.
The jellyfish remain still while different horizontal bands jump sideways. Red and blue edges stay separated. Press Play to watch the four-second composition. This page uses a compact MP4 preview; the export steps below produce a GIF.
Start with a photo whose edges you can follow
A clear subject against a simpler background makes the glitch easier to read. Here, the spotted jellyfish bells and pale tentacles stand out against dark water. Watch the large bell on the left: its outline shows both the color separation and the displaced bands.

The source is one photograph. The treatment moves image bands; it does not animate the animals themselves.
Download the practice photo
(PNG, 1200 × 1600). Keep its framing to reproduce these comparisons. For a portrait, lettering, or a cover image, start with enough contrast to recognize the subject after the channels separate.
Give color and movement different jobs
RGB Split supplies the colored edges; Slice Shift supplies the changing breaks. The example puts both in the Document’s final-image stack. Select an effect in Layers to open its controls in Active FX.
Use these starting settings:
| Effect | Setting | Value |
|---|---|---|
| RGB Split | Amount | 0.018 |
| RGB Split | Angle | 0° |
| Slice Shift | Shift | 0.06 |
| Slice Shift | Band height | 4.50% |
| Slice Shift | Coverage | 0.30 |
| Slice Shift | Variation rate | 2 |
| Slice Shift | Seed | 37, with Auto Seed off |
| Both | Mix | 100% |
Keep RGB Split’s motion off and Slice Shift’s motion on, as the recipe loads them. Leave the individual parameter controls manual. Slice Shift’s built-in Variation rate changes which bands move; it does not need a separate parameter-motion preset for this example.

One second into the example, with RGB Split Amount 0.018 and Slice Shift Coverage 0.30. Most of the photograph remains recognizable.
Raise RGB Split Amount a little when the colored edges disappear at the intended display size. Lower it if the subject becomes doubled rather than fringed. Change Slice Shift Coverage to affect more or fewer bands, and Shift to change how far they move. Adjust one control at a time.
For a still treatment before adding motion, follow the glitch portrait walkthrough. The RGB Split versus Block Displacement comparison shows why colored edges and moved image regions are different choices.
Make a short animation
Choose Animate below the canvas, then set the timeline to four seconds. Press Play if playback is paused. Use Pause while adjusting settings and Play to inspect the result.
Open Timeline settings beside the playback controls. Replace Timeline duration with 4, keep its unit Seconds, and confirm the value. Use Timeline completion: Repeat, Playback speed: 1×, and Simulation FPS: 30. The recipe loads the browser’s normal timeline defaults; these steps shorten it for this GIF.
Keep Variation rate at 2 for the first export. Raising it replaces the pattern more often; it does not add natural movement to the jellyfish. At zero, the band pattern holds still. If nothing moves, check Animate, playback, the Document’s FX motion switch, and Slice Shift’s own motion button.
This is a fresh displacement of the photo at each moment. For blocks that accumulate and smear through earlier frames instead, use the separate Datamosh photo tutorial.
Export the GIF
Use GIF export for an animated image file, and check the downloaded result. In Settings → Export Settings → Quick Export, turn on Include animation, choose GIF as the File type, then choose Custom optimization and configure:
- Size: Maximum edge, 800 px.
- Frame rate: 15 fps.
- Colors: 256; Dithering: on.
- Looping: Loop forever.
Close Settings, then choose Export → GIF in the editor toolbar. The four-second 1200 × 1600 composition exports at 600 × 800 with these dimensions. Quick Export uses the whole timeline, so shorten the timeline before exporting a shorter clip.
The browser adds a small Artfkt watermark by default. You can turn it off for free in Settings → Export Settings. Neither still nor animated export requires a desktop purchase. GIF is silent; use a supported video format when your project needs a video file instead. Video-codec availability depends on the browser and device.
If the GIF is too large
Reduce Maximum edge first, then consider a shorter timeline, fewer colors, or a lower frame rate. Export again and compare the actual files. Dithering can help gradients but adds texture; fewer colors can band the blue water. There is no single file-size setting that works for every photograph.
If the loop jumps
Watch the transition from the last frame back to the first. Forever means repeat, not seamless. This recipe deliberately changes band patterns, so a visible jump can be part of the treatment. A smoothly repeating composition requires additional timing choices; changing only the GIF’s Loop setting cannot create one.
If the result looks static
Confirm that you chose GIF, not PNG or JPG, that Animate is selected, and that Slice Shift’s motion is enabled with Variation rate above zero. Open the downloaded file in a browser: some file managers show only a thumbnail. A different photograph may also need more Shift or Coverage for movement to read at small size.
Try it on your own image
Open the glitch GIF example →, choose Open photo, and keep the first export short. Check both the subject’s readability and the file at the size you intend to share.
The selected photo stays on your device: editing and export run locally in the browser. The website uses analytics as described in the privacy policy.
The free demo is enough to make and export this GIF. Artfkt for desktop adds saved projects and the full collection library when you want to reopen the composition and develop it further. A glitch poster project is another way to use the same color-and-displacement ideas around readable text.
How this example was made
The source is Jennifer Bourn’s jellyfish photograph, released under CC0. It was resized from 2000 × 2700 to 1200 × 1620, then cropped by ten pixels at the top and bottom. Prior camera processing is unknown.
Artfkt’s production effects made the processed image and motion. The pictured frame is at one second, with manual parameter values, Slice Shift motion enabled and RGB Split motion disabled. The tutorial uses a four-second timeline and a separate MP4 preview of the same treatment. The effect changes the photograph’s pixels; it does not corrupt the source file. Rendering and encoding can vary by device.
Make something unexpected
No subscriptions. More room to create.
Bring all collections and multiple image layers together in one desktop studio. Build a look, shape its motion, and save your next starting point.
Pay US$29 once at launch (regularly US$39). Includes all current collections and Artfkt 1.x updates.
Future major upgrades are not included.