How to Make a Glitch Portrait Without Photoshop
Create a glitch portrait without Photoshop using RGB Split and Slice Shift. Follow a worked example, keep facial details clear, and export your image.

To make a glitch portrait without Photoshop, open a portrait in the Glitch browser demo, add RGB Split for colored edges, then use Slice Shift to move selected horizontal bands. Keep the treatment restrained enough to recognize the face, and export a still when you like the balance.
The finished portrait above uses that two-effect stack. Below, you can download the untreated image, follow the exact settings, and compare it with a deliberately exaggerated version to see which controls bring facial detail back.
Try the glitch portrait tutorial. This opens the demo with RGB Split selected; apply the recipe below manually. The demo includes image export.
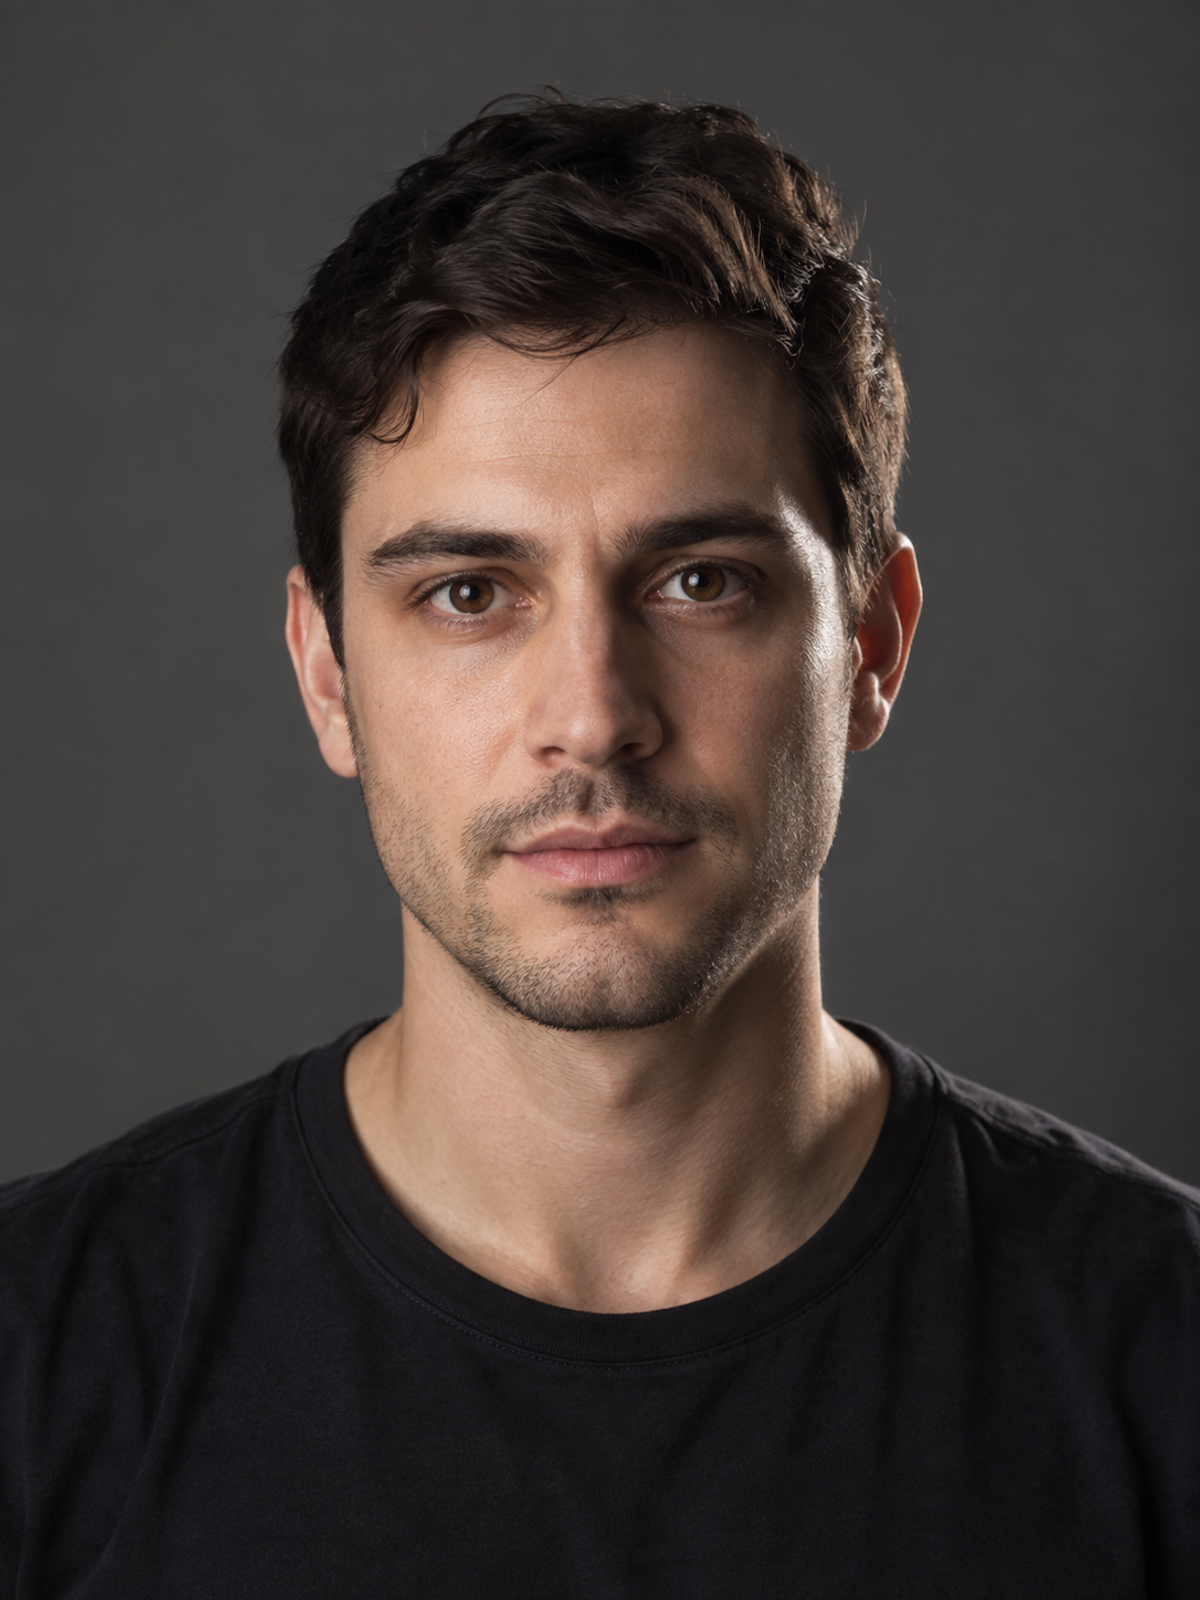
Choose a portrait with clear facial features
Start with a sharp portrait where both eyes are visible and the face stands out from the background. Hair, a jawline, and a shirt collar give color separation and displaced bands distinct edges to work on. A busy background makes it harder to see what each adjustment changes.
Download the practice portrait PNG
(1200 × 1600). This is an AI-generated portrait of a fictional adult, made for this tutorial. You can also choose your own PNG, JPG, or WebP.

Source — directional lighting defines the face, while the plain background leaves room for the colored edges.
In the demo, choose the downloaded image. Keep the canvas at 1200 × 1600, the image centered at 100% scale, and rotation at 0°. Leave playback paused with Time (s) at 0. Use the same framing for every comparison; cropping or resizing changes where the bands meet the face.
Add color separation with RGB Split
Expand RGB Split in Active FX and turn Animate: RGB Split off. Set Amount to 0.012. If Active FX is crowded, collapse Active Layer to give the effect controls more room.

Look at the hair against the gray background, then at the eyes. The colored edges are easy to see around the silhouette, while the face still reads as one person. RGB Split shifts red and blue horizontally and leaves green aligned. Increasing Amount widens the separation across the whole image.
For your own portrait, lower Amount if the eyes already look like overlapping copies. The RGB Split guide explains the control and its current default; 0.012 is the setting for this example.
Add horizontal breaks with Slice Shift
Choose Slice Shift in the FX list to add it after RGB Split. Check that Active FX lists RGB Split first, Slice Shift second. Turn Animate: Slice Shift off, keep playback paused, and enter:
- Shift: 0.04
- Coverage: 0.30
- Band height: 4.50%
- Seed: 37
- Mix: 100%
Stage 2 — RGB Split at 0.012, followed by Slice Shift at 0.04 with Coverage 0.30.
Selected bands now interrupt the hair and neckline. One crosses the eye line, but the small shift keeps the features close to their original alignment. The nose and mouth remain a useful visual anchor.
Shift controls how far selected bands can move. Coverage controls how many bands are affected; it does not select a particular part of the face. Band height changes their thickness. Seed changes the arrangement, so keep it at 37 while comparing Shift and Coverage. Mix stays at 100% for this recipe.
See the Slice Shift guide for the current controls and defaults. These effects treat the image as a whole; this workflow does not mask or protect the eyes.
Keep the face recognizable
A heavier treatment can be useful when abstraction is the goal. To see the tradeoff, we kept the same source, framing, effect order, Band height, Seed, and Mix, but raised RGB Split Amount to 0.060, Slice Shift to 0.16, and Coverage to 0.65.

Overdone for a recognizable portrait — wider color separation and more displaced bands compete with the facial features.
The mouth now has competing colored outlines, and more slices break up the face. To return to the previous result:
- Lower RGB Split Amount from 0.060 to 0.012 to bring the colored copies closer together.
- Lower Slice Shift’s Shift from 0.16 to 0.04 to bring displaced features closer to their original positions.
- Lower Coverage from 0.65 to 0.30 to leave more bands aligned. Keep Seed at 37 throughout.
On a different portrait, bypass Slice Shift first to judge the color separation alone, then enable it again to judge the band movement. If a slice still interrupts an important feature, reduce Shift or Coverage further. Try another Seed only after that comparison; it changes the pattern across the image, so inspect the whole face again.
Export and inspect your portrait
For the pictured PNG export, open Settings → Export Settings → Quick Export. Keep Include animation off, set File type to PNG, and use Original dimensions with Size set to Canvas size. Close Settings and choose Quick Export in the editor toolbar.
Inspect the saved image at full size and at the size you intend to display it. Look at the eyes, mouth, and jawline: if the small version loses the expression, reduce the treatment and export again. Browser export is included; the illustrated files are 1200 × 1600 PNGs.
Try the glitch portrait tutorial with the practice source or your own image. To apply the same effects to lettering and graphic shapes, follow the glitch poster walkthrough.
How this example was made
We created the fictional source portrait with AI and resized it to 1200 × 1600 for this exercise. The RGB Split, combined, and exaggerated treatments are actual PNG exports from the Glitch browser demo, captured with WebGPU, animation off, and playback paused at time 0. The source framing stayed unchanged.
The settings describe these examples, not permanent defaults. Other photographs will respond differently, and rendering can vary by device.
Make something unexpected
Keep exploring in Artfkt.
Bring all collections and multiple image layers together in one Mac studio. Build a look, shape its motion, and save your next starting point.