How to Add JPEG Artifacts to a Photo
Lower Quality until fine edges ring, then enlarge Block scale to see the blocks. Compare both on one facade and export a PNG.
TL;DR
- Use JPEG Damage to quantize a photo into blocks and ringing. It does not corrupt the file.
- Compare Quality and Block scale separately. On this facade, Color loss barely changes the glass.
- The treatment is a spatial compression simulation. It is not a JPEG encoder setting, a Macroblock copy, or a datamosh.

To add JPEG artifacts to a photo, lower Quality until edges ring, then raise Block scale if you want the blocks themselves to read. Glitch’s JPEG Damage effect does that on a photograph you already have. It does not rewrite the file’s bytes.
Try the JPEG example. It opens the practice photo with the settings below. Choose Use your own image to apply the same treatment to another photo. Browser editing and export are free.
This is a spatial compression treatment. It is not a damaged JPEG that a decoder might fail to open, and it does not reproduce one encoder’s quality number. Macroblock copies tiles. Datamosh smears a still across earlier frames. JPEG Damage quantizes the picture and rings its edges.
Start with hard edges and a little color
A soft, low-detail photograph hides both the ringing and the blocks. Choose a picture with fine lines and at least one saturated area, so you can see what each control changes.
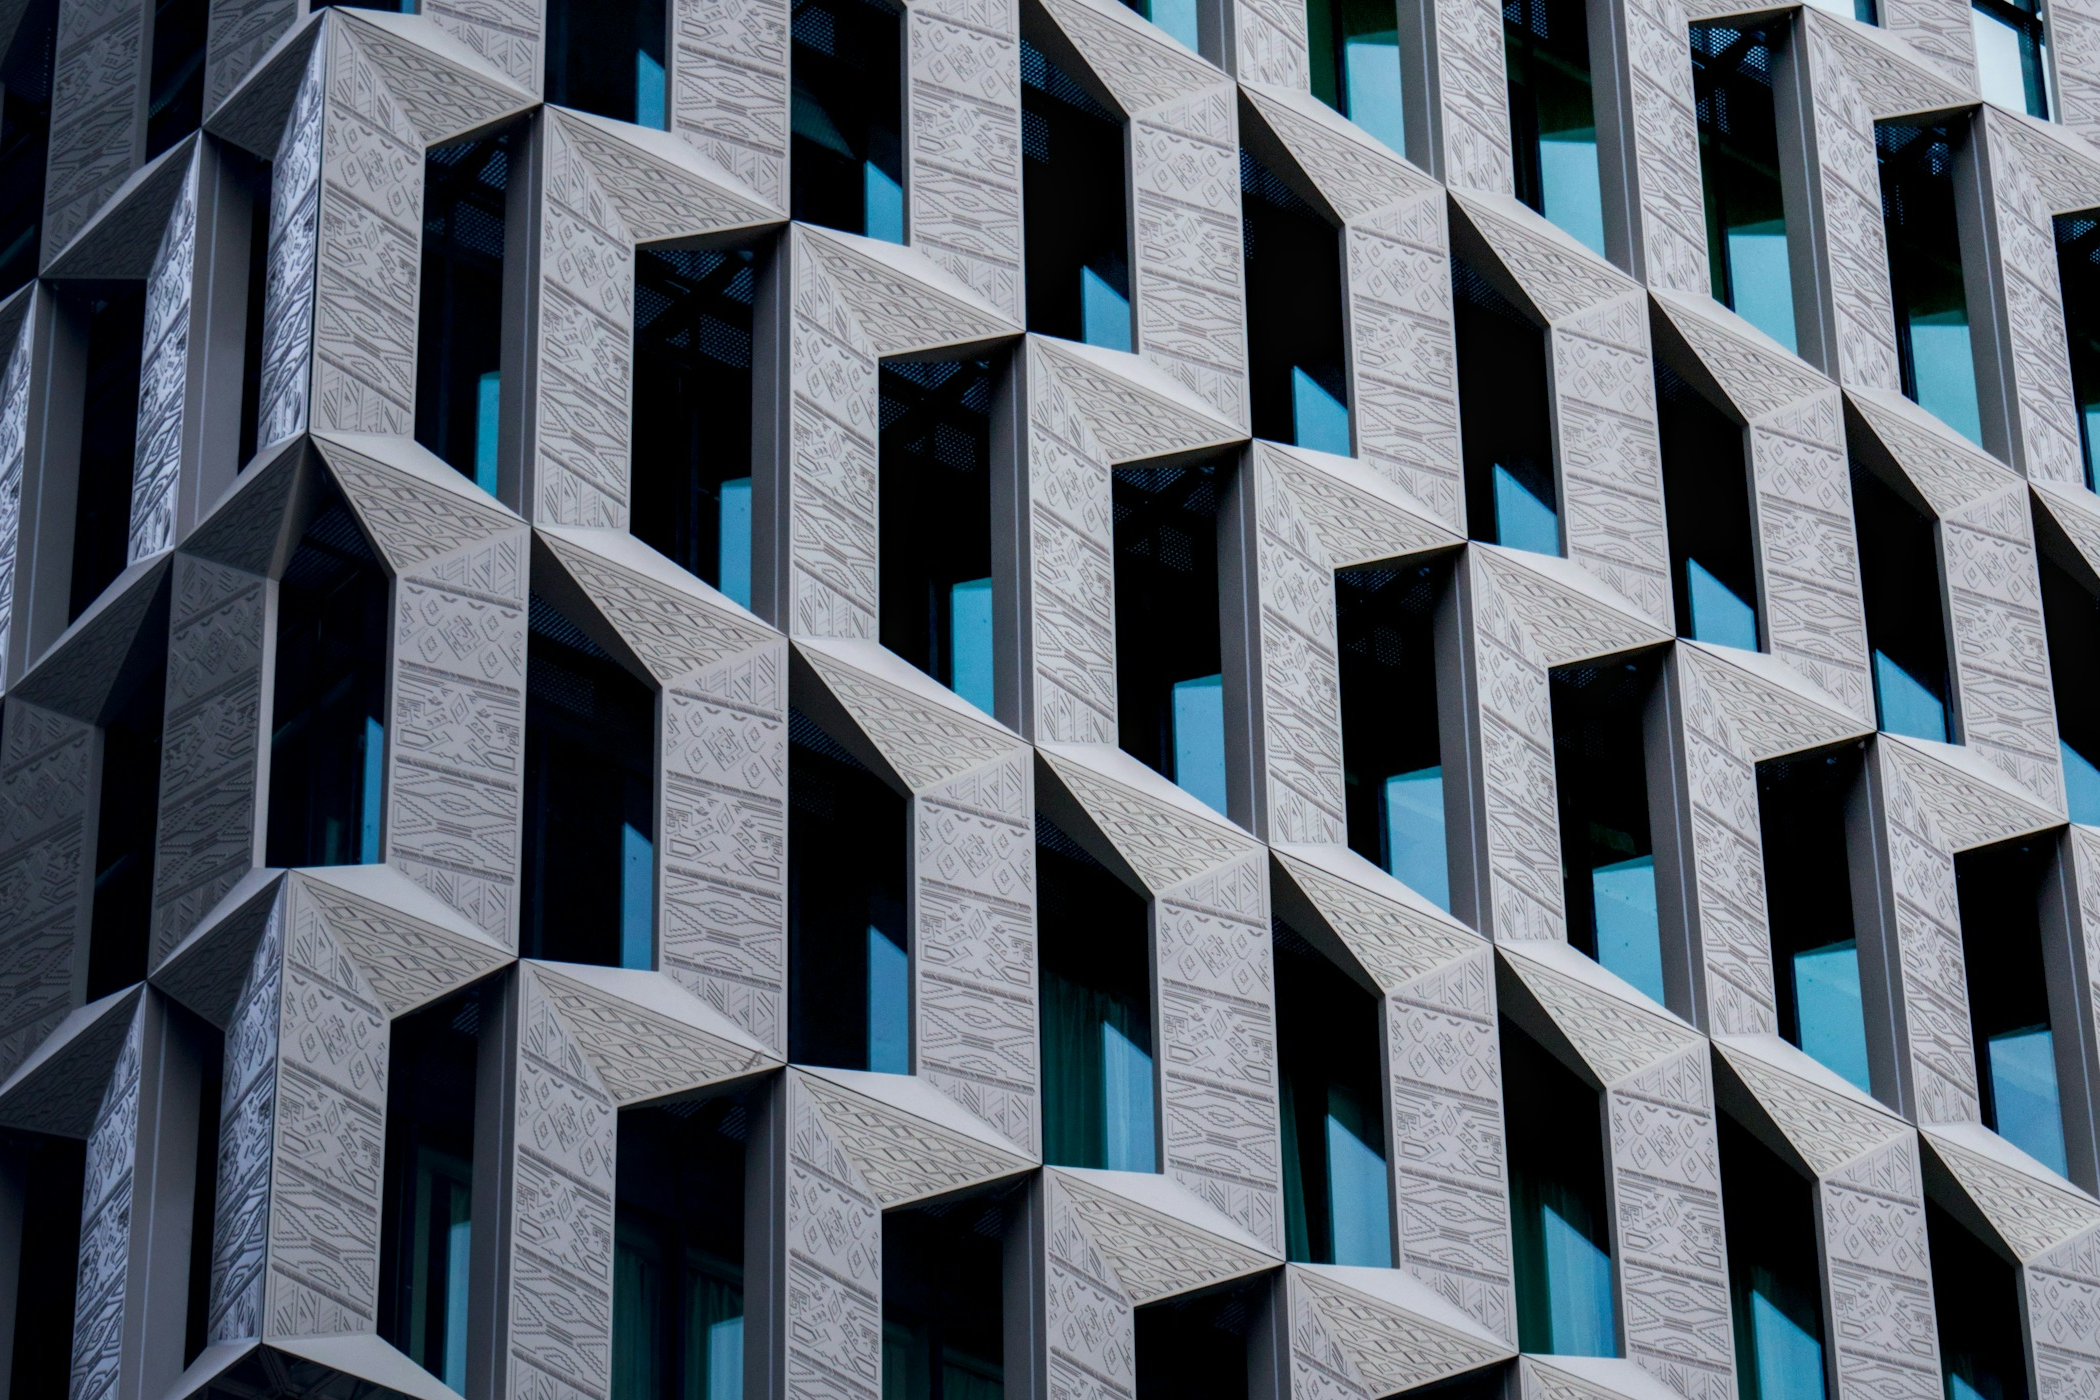
This tutorial uses a facade of patterned concrete and teal glass. The relief shows Quality. The repeating panels show Block scale.
Download the practice photo
(PNG, 2100 × 1400). Keep the original framing and dimensions for these comparisons.

The source. The carved relief and the teal glass are already in the photograph.
Apply JPEG Damage
Open the worked example, expand JPEG Damage in Active FX, and use:
- Quality: 8%
- Block scale: 2
- Color loss: 1
- Mix: 100%
Quality 8% is the setting for this example. The effect’s own default is 35%, which leaves this facade’s relief much closer to the photograph. Keep Motion: JPEG Damage off and playback paused at zero.
The example treatment. Fine relief starts to ring, and the glass stays teal.
For your own image, lower Quality until the edges you care about start to ring, then check the result at the size you will share. A large export can hide blocks that are obvious on a thumbnail.
Compare Quality and Block scale separately
The following matching 720 × 720 crops come from the full-resolution renders, starting 40 pixels from the left and 180 from the top. They show the carved relief beside a dark opening. No extra sharpening or grading was applied.

Raise Quality to 100%
Set only Quality to 100%. The carved grooves come back. Block scale stays at 2, so this comparison is the compression amount, not the block size. Quality 100% leaves the photograph untreated. It does not mean the file was saved by a camera at “quality 100.”

Enlarge the blocks
Restore Quality to 8%, then set only Block scale to 8. The relief breaks into coarse squares. The opening and the glass stay in place; the treatment does not slide strips of the picture sideways.

Quality and Block scale are different choices. Use Quality for how much detail the transform keeps, and Block scale for how large those blocks are at the output size. Read the JPEG Damage control reference for every control and its limits.
Color loss stays at 1 in every comparison above. On this facade, Color loss 0 and Color loss 2 barely change the teal glass, so that control is not the comparison. Raise it on a photograph with stronger color if you want the color-difference channels to quantize further, then set it back to compare.
Export the photo
Choose PNG in Export in the browser demo (Quick Export in the desktop app), save the image, and check it at the size you intend to share. Browser export is included. The saved PNG is a picture of the treatment. It is not a corrupted JPEG, and opening it will not depend on a damaged file header.
Your selected image stays on your device: editing and export run locally in the browser. The website uses analytics, as explained in the privacy policy.
Try the recipe on your own photo. For blocks that copy tiles instead of ringing edges, use the Macroblock guide. For a still that smears over time, follow how to make a datamosh effect from a photo. A cover that keeps its title readable is a different job: glitch effects for album cover artwork.
How these examples were made
Artfkt rendered the facade with its production JPEG Damage effect on WebGPU at 2100 × 1400, with motion off and time zero. The example uses Quality 8%, Block scale 2, Color loss 1, and Mix 100%. Each comparison changes one control from that example. The full-frame display copy is reduced to 1600 pixels wide. The detail crops retain the rendered pixels.
The source is Aldo Vukaj’s facade photograph, used under the Unsplash License. The 3200 × 2136 photograph was cropped to 2100 × 1400, starting 550 pixels from the left and 368 from the top. Prior processing is unknown. The comparisons use the same 720 × 720 crop at (40, 180) inside that frame. Artfkt produced the actual effects. Results can vary by source and device.
Make something unexpected
No subscriptions. More room to create.
Bring all collections and multiple image layers together in one desktop studio. Build a look, shape its motion, and save your next starting point.
Pay US$29 once at launch (regularly US$39). Includes all current collections and Artfkt 1.x updates.
Future major upgrades are not included.